Welcome to the Vexlio blog! In this introductory post, we’ll look at how object “snapping” works in Vexlio and how you can use it for easy precision in your diagrams. We’ll see the types of snap points you can use and how to use them effectively. Let’s jump in!
The snap points
There are snap points on every object in a Vexlio drawing, even images and text, but the location of the snap points depends on the type of the object. In the image below, we have a rectangle object and three ellipse objects. The snap points on each object are highlighted by the small white squares (which is what Vexlio displays when your mouse is near a snap point):

Geometric snap points shown on several objects.
These snap points occur at various points along the geometry of the object. For example, on a rectangle, there is a snap point at each corner, and at the midpoint of each edge. On an ellipse, there is a snap point every 45° along the edge (this is true for non-circular ellipses as well, i.e. ovals).
One important thing to remember is that the snap points occur along the object’s geometry, not its visual appearance. You can see this in the thicker width ellipse: its snap points remain along the geometric outline of the ellipse, even though its line width has been made thicker.
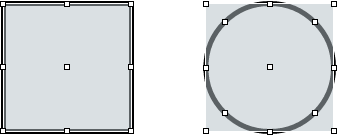
In addition to these snap points, there are also snap points on the “bounding boxes” of each object. In the image below, we have the same objects with their bounding boxes shown outlined with a transparent rectangle:

Bounding box (the transparent rectangles) snap points.
Notice that in the case of the rectangle, the bounding box snap points are the same as the geometric snap points at each corner. In the case of the ellipses, four new snap points are added, one at each corner of the bounding box. Again note that these are the geometric bounding boxes, and not the visual bounds.
In total then we have 9 snap points per rectangle and 13 per ellipse, which is just the combination of the geometry and bounding box snap points:

All available snap points for each object.
For objects like text and images, Vexlio does not create geometric snap points, and so the only ones present are the bounding box snaps:

Only bounding box snaps on text and images.
And finally for paths, Vexlio does not create bounding box snap points, and so the only ones present are the geometric snaps, which occur at every path point:

Only geometry snaps on paths.
Interacting with the snap points
Two objects are automatically snapped together when two of their snap points get close to each other. This happens when you are either moving objects around, or creating new objects. When moving objects, you’ll notice that the object appears to jump around slightly as it crosses over other objects. This is snapping in action: each “jump” is an indication that two snap points became close enough together, and the object being moved was adjusted to make the snap.
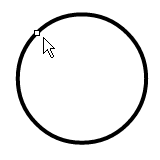
When you create new objects, you will see a small white box appear whenever your mouse is close to a snap point:

When your mouse gets near a snap point, Vexlio will display the small white box to highlight it.
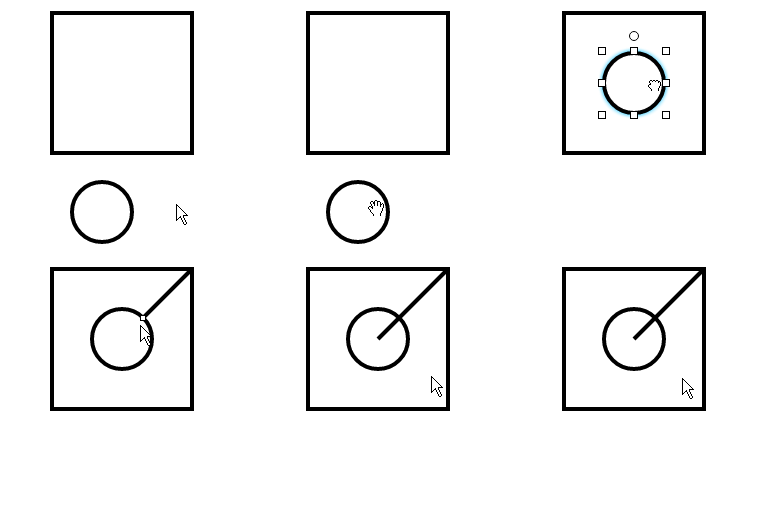
When you click the mouse with one of these snap points highlighted, the object you are creating such as a line, rectangle, or ellipse, will be snapped to that point. This is better illustrated with an animation:

Snapping in action.
Initially, the small circle is moved to the center of the square, snapping to various rectangle points along the way. Then, when the line is drawn, you’ll notice the small white box appear, indicating that the line’s points will be snapped to those locations.
Align snapping
The other type of snapping that Vexlio offers is “align” snapping. This feature is extremely helpful for quickly and easily making sure two or more objects are perfectly aligned. Of course, you can always use the alignment buttons on the right side of the Vexlio window, but knowing how to use align snapping will save you a lot of time and mouse clicks.
Align snapping occurs automatically when a snap point on an object becomes horizontally or vertically aligned to a snap point on another object, even if they do not touch. Align snapping occurs when creating or moving objects, or creating paths. The animation below shows align-snapping the smaller rectangle to the centerline of the larger rectangle by dragging it until the red dotted guide line appears.

Alignment snapping in action when moving and creating objects and paths.
The smaller rectangle is then duplicated (by Ctrl-dragging it) and moved to the right. The align snapping guide appears and indicates that as the duplicate is moving, it is staying align-snapped to the centerline of the first rectangle. Finally, a path is created between the two smaller rectangles, using a combination of point and align snapping to ensure it connects the rectangles perfectly.
Enabling and disabling snapping
While snapping is very convenient, sometimes it can get in your way. In that case, it’s easy to toggle snapping off, make your adjustments, and then turn it back on again. You can use the keyboard shortcut % (i.e. press Shift-5), which will toggle snapping on and off. Or, use the “Edit → Snapping” menu to turn on and off point snapping or align snapping separately.
Check back for more
That’s it for this post, but we’ve got a lot of great things to share and talk about in the future, so be sure to check back here. You can also follow us on Twitter to stay up to date with Vexlio news. Also be sure to let us know if you have a subject that you’d like us to tackle here!
